Showing posts with label holidays: christmas. Show all posts

Friday, November 23, 2012

DIY Mod Podge and Yarn Wreath


Wrap it up, Podge it up and Hang it up!

This project we designed with our new Mod Podge Papers and Podgeable Snowflakes.  Available at most Michaels.  Check out our page at Plaid to view all our Mod Podge projects.

What you need:
Foam Wreath
Yarn
Hot Glue
Plaid ® Hot Glue Gun Helpers
FolkArt ® Metallics - Pearl White, 2 oz.
Foam Paintbrush
Rhinestones
Wood star
Mod Podge ® Hard Coat, 8 oz.
Mod Podge Holiday Papers or other holiday themed scrapbook papers
Pencil
Scissors
Trim

Instructions:


1. Wrap the wreath with yarn. Use hot glue to secure the ends as you wrap. Hot glue gems to the wrapped wreath.

2. Paint the star with the Metallic Pearl White paint.


3. Make a template of the star shape and cut out the shapes from different holiday themed papers. Apply a coat of Mod Podge to the back of the papers and position on the star. Smooth any airbubbles with your fingers. Wait 15 min. and top-coat with a layer of Mod Podge.

4. Hot glue trim around the tips of the star. Hot glue the star to the wreath.


* DIY VIDEO ~ 15 Holiday Craft and Gift Wrapping Ideas ~ DIY VIDEO *


Watch this video for 15 Holiday Craft and Gift Wrapping idea using the Podgeable Papers and Snowflakes.

Join us on Facebook, instagram, pinterest and twitter!

Happy Holidays!
Cathie and Steve

Monday, October 15, 2012

Introducing our new Holiday Mod Podge Podgeables!


We could not be more thrilled with our new goodies for Mod Podge!  We have new holiday papers in two different colorways and snowflake Podgeable shapes. Watch the video below to see what you can make with them! :)


xoxoxoxo
Cathie and Steve

Join us on Facebook, instagram, pinterest and twitter!

Thursday, December 22, 2011

Webisode: Luminary Making


Whip up a quick Luminary for a last minute holiday gift or decorating idea.  To tint the Mod Podge, we are using broken eyeshadow.  Complete instructions are here>>> Luminaries.

Monday, December 19, 2011

DIY - Country Chic Christmas


I love pink!  So we decided to whip up a pink and white crackle finish Christmas! Enjoy and Have a Super Happy Holiday Season....Merry Christmas and Happy Hanukkah.

XO Cathie


For the vase, we attached burlap to the front of a glass block with Mod Podge and then we layered the front with scrapbooking embellishments and snowflakes.  The twigs were wrapped with torn strips of muslin fabric and adorned with crackle finish birds.


 The wood birds were just .40 cents each at Michaels.  I have seen similar at Hobby Lobby and Jo-Ann Fabrics.

 To create the crackle effect.....I use Folk Art Crackle Medium.  Make sure the first coat of paint is VERY dry before applying a coat of Crackle Medium.

The crackle finish taking shape.  I love this look.  To alter further.....rub the edges with inks or water color markers.


Work in progress....To create the two-tone crackle, I only painted every other section with pink paint.

 I spy another crackle bird....


Sunday, December 18, 2011

Make it: Recycled Card Ornament


Re-craft the stacks of holiday cards from years past.... and make.....ORNAMENTS! They are simple to make and after you make just one ornament you will have the hang of it!

Materials:
several used greeting or note cards
2-1/2" punch, or a glass with a 2-1/2" base for tracing
pencil
small scrap of cardboard
ruler
glue stick
binder clips
hole punch
decorative ribbon
optional -- bone folder

1. Use the 2-1/2" punch (or trace a 2-1/2" glass base) to punch 20 circles from assorted cards. 2. Using a ruler and pencil, draw a triangle measuring 2-1/8" on all sides on a scrap of cardboard; cut out the triangle to use as a template.


3. Trace the triangle onto the back of each greeting card circle and score each circle along the triangle lines using a bone folder or ruler. The circle should fold so the printed sides of each circle are on the interior of a small triangle-bowl shape.

4. Using five of the scored circles, glue stick the flap of one circle to the flap of another, continuing with all five circles to form a star shape. Clamp together with binder clips and let dry for 15 minutes.

5. Working with 10 more greeting card circles for the middle layer, glue the flaps to the bottom layer flaps, clamp and let dry.


6. Use the last five greeting card circles to form a top layer. Glue, clamp and dry.
7. Punch one extended flap with the hole punch, thread a length of decorative ribbon and hang.

Saturday, December 17, 2011

Dollar Saving Holiday Ideas

Here is an interview I did for Real Simple magazine.


Dollar Saving Holiday Ideas: WRAPPING SUPPLIES

Gift Tags: Recycled last years holiday cards into gift tags by using a decorative punch or cutting a traditional tag shape.

Glittered Pinecones: Add a touch of nature to a package by tying on small pinecones and twigs. We like to add a little pop with Mod Podge and brown glitter to the tips of pinecones.

A Leg Up on Wrapping: Create a denim wine bag with the leg of an old jean. Just cut the leg to the appropriate height for your bottle. Sew or staple across the bottom. Use a ribbon to tie the bag closed.

Tins: Use Mod Podge to decoupage out-of-season (or style) tins and boxes into modern gift boxes by attaching decorative paper to the outside.

Gift Bags: Create simple gift bags with a punch of color with plain paper “lunch” bags. Cut a scalloped edge across the top of a plain paper bag, punch holes across the top and thread closed with a pretty ribbon, tie the ends into a bow.

Photocopied Paper: For small gift-wrap jobs you can make your own color copied paper collages. For extra savings use color paper on a black and white printer.

Kids Art: Decorate large rolls of butcher paper with kid’s holiday drawings. Let the kids know whom the package is for and have them draw something special for them. I bet this paper doesn’t get torn and tossed.

Yarn Tied: Pass on ribbon and say yes to yarn. Look for big bold yarns to tie up your packages. Way cheaper than ribbon!

Dollar Saving Holiday Ideas: ORNAMENTSDollar Store Decor: Dollar store ornaments can become very stylish with a spray of high gloss paint. We like to use 3 different colors of spray paint on different sized and shaped ornaments. Krylon has tons of bold new colors available, everything from candy colors to natural colors. (Both color pallets blend well with traditional silver and gold)

Papered: Origami paper ornaments and garland can be made for pennies. For “book lovers” you could use pages from old books (just make sure they are not valuable). For a “kids” tree you could use the funny pages to make a humorous statement.

Darn Yarn: Pompoms are easily made with just a few winds of yarn. Use sparkly metallic yarns in taupe, gold, white and silver to create a homespun elegant look. Add Yarn bows to inexpensive clear ornament balls to counter balance the pompoms.

Rocker At Heart: Glue broken bits of CD’s to silver Styrofoam balls and add a ribbon hanger to create a disco ball ornament. Adorn a small tree with disco balls and guitar picks.

Scents of Cinnamon: Tie bundles of cinnamon sticks and small twigs together with ribbon and hang from a tree.

Baked Dough Saves Dough: Kids love playing with dough and creating homemade ornaments with salt dough (made for a few dollars at home) is a fun way for families to get creative together.

Dollar Saving Holiday Ideas: HOLIDAY DECORATIONSBranches & Birds: Use metallic spray paint to spruce up large and small broken tree branches, place in a glass vase and hot glue white birds to the branches.

Papered Garland: Working with old holiday cards or scrapbooking paper, punch decorative shapes with oversized punches (or trace around a glass and use scissors), attach the tops to a long piece of ribbon using hot glue. Add stickers to spell out holiday words like, Noel, Joy and Merry Christmas.

Can You Picture: Remove the glass and backing from oversized frames, paint with high gloss spray paint in rich plum and silver colors, dangle ornaments and family photos from the center with pretty ribbon. Perch the frames on a mantle or hang on the wall.

Pomanders: Create a centerpiece with stacks of oranges, grapefruits and lemons. Add cloves and lemon leaves for color and scent.

Candle Glow: Add drama to plain candles by inserting decorative brads into the sides. You can get rhinestone, snowflake even pearl brads.

Wrapped Wreath: Create a fabric wreath by cutting strips of 4 or 5 different fabrics into 1” wide pieces. (We like to use a monochromatic color pallet and different textures of fabrics – like, wools, cottons, corduroy, etc.) Wrap the strips around a wire wreath form until the wreath is covered. Add a few old ornaments to the center and you are ready to hang.

Tree Trimming Garland: If you are decorating a fresh tree, collect the trimmings and wire them together to create a mantel or door garland.

Dollar Saving Holiday Ideas: HOLIDAY CARDSShop Sales at the End Of The Season: We always purchase cards on clearance for 75 – 90% off the retail price at the end of the season.

Make Your Own: Begin with blank cards and add simple scrapbooking embellishments, photos, even a kids hand print.

Vintage Flair: Make black and white copies of a favorite family photo, use colored photo makers to add highlights to the picture.

Go High Tech: Send your cards using an online greeting card program or create your own jpegs greeting and email to friends and family.

Dollar Saving Holiday Ideas: HOSTESS PARTY GIFTSMini Makeover: Rewrap inexpensive soaps or votive candles with pretty papers, create a designer look by adding fun bows and embellishments.

Recipe Swap: Do you have a friend that always loves your cooking or baking? Make him or her a set of recipe cards.

How Does your Garden Grow?: Do you have a great indoor herb garden? Create an herb gift of either fresh cut herbs or home dried herbs. Your friends will beg for more!

Mini Breads: Bake a large batch on mini breads to have on hand during the season (they freeze well) wrap with butcher paper, add a yarn or ribbon tie and give as needed.

Party Pics: present your hostess with a small empty photo album and let her know that you have brought along your camera to be the official photographer as a gift to her. Make sure you have the pictures printed within one week of the party.

Dollar Saving Holiday Ideas: HOLIDAY SHIPPING

Ship Early & Light: Don’t get caught with last minute (high dollar) shipping prices.

Junk Mail Revamped: Use shredded junk mail instead of store bought peanuts.

Popped Up Packing: Old fashioned popped popcorn can be used as packing peanuts – just don’t add salt or butter. Forget trimming the tree with popcorn – time is money – trust me I tried it before.

Don’t Toss The Boxes: Recycle boxes from retail stores for shipping boxes. Just make sure they are thick enough cardboard.

Wednesday, December 14, 2011

Dollar Store Makeover: Glitter Deer


Have you seen the cute glitter deer at the dollar store?  Mine had gold and silver ones - only a buck each.  I hot glued some velvet leaves {{from my supply shop}}, some gold velvet ribbon and a bunch of buttons from my button stash around the neck.  I made a few deer to match the new stockings I made this year.  Have a look here to see the new stockings.

These are the velvet leaves.  Visit the shop here.

Happy Holidays and Dollar Store Hunting!
XO - Cathie

Craft This: Custom Painted Coffee Mugs


Time to cozy up with a custom painted mug.  Perfect for serving tea, coco or coffee.  The painting is super easy with reusable sticky stencils and FolkArt Enamel Paint.  These we made these for the  Michaels Cyber Monday event.  Have a peek at the video below. 


Homemade Hard Candies


Classic Hard Candy

The ingredients are simple, the steps are so easy and the flavors are divine. You can create a traditional lemon, English toffee or peppermint candy or try something a little more modern like root beer, pina colada or cappuccino candy.

Candy making shops and online suppliers have many different molds and flavorings. You can create lollipops or mini heart shapes, you can add exotic colors and delicious flavors the sky is the limit when it comes to making hard candy.

This classic recipe, with delicate lasting flavor and just enough sugar, always tames my sweet tooth. If you make a batch for yourself or as a gift, I guarantee it won’t be long before you are boiling up a second batch. One note about making candy, it best done on low humidity days. A rainy day can ruin a batch of candy.

Classic Hard Candy
2 cups white sugar
1 cup water
3/4 cup light corn syrup
1/2 teaspoon raspberry food grade flavoring
6 drops red food coloring
powdered sugar
candy thermometer
cookie sheet with a lip, greased with vegetable oil

In a large saucepan, mix together sugar, corn syrup and water. Stir over medium heat until sugar dissolves. Add your candy thermometer to the pan (avoid touching the bottom of the pan) Bring mixture to a boil without stirring. When syrup temperature reaches 260o F, add 6 drops of food coloring. Do not stir.

When the temperature reaches 300o F, promptly remove from the heat. After boiling action ceases, add flavoring and stir. Pour onto the cookie sheet. When cool, break into pieces and dust with powdered sugar to prevent sticking. Store in airtight containers.


Yummy Yummy!
xo Cathie

Monday, December 12, 2011

How to Make a Tomato Cage Christmas Tree


This is an oldie but goodie!  We first made the trees on the 2008 Creative Juice Holiday special.  The response was so amazing that I am bringing back the video!  Visit the original post here.

Happy Holidays!
xo 
Cathie

Sunday, December 11, 2011

Country Inspired Altered Candle Holder


Transform a plain glass cylinder into an Altered Candle Holder with just a few scrapbooking supplies and burlap fabric.  We used Mod Podge to attaching the fabric to the glass.  The little bird embellishment was just a .50 cent wood cut-out that we altered with paint and crackle medium.


Happy Crafting!
XO
Cathie

Saturday, December 10, 2011

Vintage Style Cone Trees with Burlap and Crackle Paint


Sugar sweet with a touch of rustic.  Super easy to make!  I heart pink so that was the color of choice for this project....but I think this would be awesome in green or gold as well.  I used FolkArt paints and Crackle Medium.


Here are some ideas:
Really Sexy Tree...try black for the base-coat with a gold top-coat.
Traditional Tree...try dark brown for the base-coat with an evergreen top-coat.
Seaside Tree...try baby blue for the base-coat with an ivory top-coat.
Modern Tree...try white for the base-coat with a lime green top-coat.

The color combinations are endless!  BTW so are the embellishments....you can use feather trim, ribbons, pompom trim, etc.

Happy Holidays!
xo
Cathie

Friday, December 09, 2011

SEW EASY: Faux Christmas Stockings Made From a Vintage Bedspread and Place-mats.


 DIY Faux Stockings

Can you believe this was once a bedspread and a place-mat?

Faux Stockings?  Yes faux!  I decided to make these sox as decorations.  No need to line them - just a super quick and easy decorating idea.  We each have our own personal stockings that Santa fills and those sox are tucked under the big tree and opened on Christmas morning. These stockings are just for looks!


This is our third Christmas in our new house and this year I decided to up-size and down-size at the same time.  Sounds funny!  I gotta get my holiday decorating under control - so I am planning on boxing the ornaments and accouterments by room or tree.  I am setting a look for each space and I am gonna try to stick to it for a few years.  I am positive that this will make holiday decorating easier and faster next year....(haha) I currently have 5 trees decorated and a gazillion little mini trees.

I decided that for the front living-room, I wanted an off-beat color palette.   So I went with gold, deep teal, olive green and silver.  I had lots of items in this color family and needed to make some new.  I am making faux stockings (quick and easy) for decorations, a small tree skirt, cone trees and a few toss pillows.  For the fabric I am using a vintage gold bedspread that was given to me by my MIL and teal place-mats from Target (a few years old).  I have matching runners for the place-mats so I can use them as decorations too.


 First I made a stocking pattern.  For this I traced a stocking that I made for my hubby 11 years ago.  I have no idea if I used a pattern or just free-handed it.

Working with the fabric in a double layer and right sides together I pinned the pattern in place.

Next, I cut out the stocking pattern.  I am making 3 faux sox for across my mantel...so I cut 3 sets. 

 Pin the pieces together along the edge.

 Stitch the seams.  I only allowed for a small seam allowance.

Clip the seams every 1/2 inch.  This allows for soft curves.

Turn the stocking right side out.

I had to trim down the place-mat to a small size.  I decided to loose a section in the middle and seam up.  To do this I trimmed away a few inches.  BTW - I like to use matte scotch tape for quick markings.  Super simple.  Works great on cotton etc.  Not good on silks.

Trim away the center.  I'll saving the scraps to incorporate into the pillows.

Pin the edges.

Sew the seam.

Open the place-mat with the seaming running vertical in the center and position the top of the sock in the far left corner.  Make sure the toe of the sock is pointing to the right.  Pin and sew into place.

Flip the place-mat in half.  Pull the fabric so it has an inch over hang.  See the edge in the picture.

Fold the place-mat in half.

Hand sew the side seam closed.

Love this gold ribbon.  Leftovers from Creative Juice.

Grab some buttons.

Hand sew a loop hanger to the corner.  A silk flower with a rhinestone button to the left corner.  BTW the silk flower is from my shop..... Silk Flower Section at Cathie Filian Supply Shop.

Hand sew buttons to the top of the stocking.

Hang across the mantel.  You can see from the picture that I still need to sew the buttons to the center stocking.  Time to get stitching!

Happy Holidays...XO!
Cathie


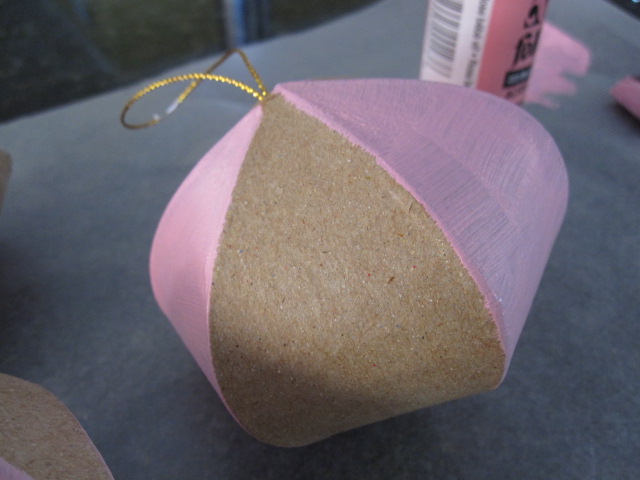
DIY Vintage Style Ornaments

Vintage Style Ornaments

So cute and simple to make!

These were designed for Plaid and we used Folkart Crackle Medium to achieve the crackle look! The mini pom pom trim was some scrap trim.  I think I originally got it at Jo-Anns.

Instructions are here.


Tuesday, December 06, 2011

Pooch Style: Santa Baby!

Have a peek at this four-legged cutie all dressed up in his Santa suit!
This costume is from by Dog Costume Book, Bow Wow WOW!

So tell me???

Do you dress your
dog for Christmas?

LinkWithin

Related Posts Plugin for WordPress, Blogger...