With
a little Mod Podge and Scrapbook Paper you can make a Recipe Box for
Mother's Day! We picked up the papermache house at Michaels. The
zipper flower is made with zipper trim from our supply shop and the
center is a Mod Podge Podgeable shape.
Today we are making over a jar candle with extra bits of scrapbook
paper and Mod Podge. The little charm is one of our metal pendant
blanks for Mod Podge and the paper is one of our designs too. It is
really easy to alter a candle and they make awesome gifts!
Summer Style via Cathie and Steve....ok well maybe more Cathie on this one! This time we are altering a Cowboy Hat with Mod Podge and Fabric! This project can be whipped up in under an hour. So grab some Fabric Mod Podge and your favorite floral fabric and get making! We nabbed the plain hat for 9 bucks and the fabric was less than 2 bucks!
I love using Mod Podge to glue seed beads. It is so easy and the results are stunning. I like to use the thicker formulas...like Brushstroke or Outdoor but the other formulas will work you just need to add more Podge!
Covering a photo mat with fabric and Mod Podge is easy and a great way to make a customized photo mat in under 1 hour. This fabric was from Jo-Ann fabrics and it is designed by Waverly. This was designed for Plaid...check out all our Plaid Projects here.
Zipper flowers are so quick and easy to whip up and they made a sweet bouquet. These flowers were made with Mod Podge, Large Podgeable Shapes, Zippers and Wood Dowels.
This was designed for Plaid using our Products for Mod Podge.
Valentine's
Day is just around the corner and you still have time to whip up this LOVE themed gift box. The heart box is papermache and was $2! For complete instructions visit our project page at Plaid:Cathie and Steve for Mod Podge.
Valentine's
Day is just around the corner and you still have time to whip up this wood photo block. The photo collage features Mod Podge, embellishments and the wedding pick of one of my best mates! For complete instructions visit our project page at Plaid:Cathie and Steve for Mod Podge.
Valentine's Day is just around the corner and you still have time to whip up this sweet yarn wrapped wreath. The heart in the center features, Mod Podge, stencils and the wedding pick of one of my best mates! For complete instructions visit our project page at Plaid:Cathie and Steve for Mod Podge.
Have you tried Mod Podge Photo Transfer? It's fun and you can use this technique to make so many different craft projects.
One note! Your image to transfer needs to be a toner copy of the image. Not ink-jet printed or an
actual photo. You will most likely have to do this at a Kinko's type
place. It can be a black and white or color copy and it works best on plain paper
(not the thick kind).
This project we designed with our new Mod Podge Papers and Podgeable Snowflakes. Available at most Michaels. Check out our page at Plaid to view all our Mod Podge projects.
What you need:
Mod Podge ® Acrylic Shapes - Designer Shapes
Plaid ® Hot Glue Gun Helpers
Mod Podge ® Hard Coat, 8 oz.
Mod Podge Holiday Papers or other holiday themed scrapbook papers
Wood bird
Pencil
Scissors
Foam paintbrush
Hot glue
Silk flowers
Rhinestones
Trim
Instructions:
1. Trim holiday papers to fit on the surface of the wood bird. Apply a coat of Mod Podge to the back of the papers and position on the bird. Smooth any air bubbles with your fingers. Wait 15 min. and top-coat with a layer of Mod Podge.
2. Trace the heart shape onto holiday themed papers. Cut out the shape. Apply a coat of Mod Podge to the back of the paper and position on the back of the heart Podgeable shape. Smooth any air bubbles with your fingers. Wait 15 min. and top-coat with a layer of Mod Podge. Allow to dry.
3. Hot glue trim to the tail. Attach the heart to form a wing with hot glue. Add silk flowers, rhinestones and embellishments in your desired pattern.
* DIY VIDEO ~ 15 Holiday Craft and Gift Wrapping Ideas ~ DIY VIDEO *
Watch this video for 15 Holiday Craft and Gift Wrapping idea using the Podgeable Papers and Snowflakes.
Snowflake Pendant Necklace made with Mod Podge Podgeables
This pendant is so easy to whip up and you can attach it to any necklace you own with a jumpring. The best part is that after the holidays, you can just take the pendant off and you have your regulat necklace back. Easy crafted holiday jewelry without the fuss. This project we designed for Plaid. You can see all our projects for them here.
What you need:
Mod Podge Acrylic Shapes - Basics, Flat & Charm
Mod Podge Podgeable Snowflake or other snowflake shape embellishment
Mod Podge Hard Coat, 8 oz.
Mod Podge Holiday Papers or holiday themed scrapbook papers
Pencil
Scissors
Foam paintbrush
Hot Glue
Snowflake Rhinestones
Jump-ring
2 Jewelry pliers
Necklace
1. Create the Podgeable pendant by placing the shape on holiday themed
papers, trace around the shape and cut out the design. (For this design
we used one holiday shape and one small circle.) Apply a coat of Mod
Podge to the back of the Podgeable shape and to the top of the paper,
sandwich the two together, press with your fingers and allow to dry.
Once dry, trim any excess paper from the edges. Repeat with the circle
shape.
2.Once they are dry, hot glue together with the circle in the center. Add a snowflake gem to the center.
3. Attach to a necklace by adding a jump-ring to the hole in the Podgeable shape and link it to the chain.
Transforming a plain gift bag is easy with Mod Podge and scrapbook paper. This project we designed with our new Mod Podge Papers and Podgeable Snowflakes. Available at most Michaels. Check out our page at Plaid to view all our Mod Podge projects.
Handmade holiday jewelry is easy to make with Mod Podge Snowflakes!
If you need some quick holiday bling or a quick DIY gift - then a Snowflake pin is just the project for you! This Snowflake Pin was designed with our new Mod Podge Papers and Podgeable Snowflakes. Available at most Michaels. Check out our page at Plaid to view all our Mod Podge projects.
What you need:
Mod Podge Holiday Papers or holiday themed scrapbook papers
Mod Podge Podgeable Snowflake or other snowflake shape embellishment
Mod Podge ® Acrylic Shapes - Basics, Flat & Charm
Mod Podge ® Hard Coat, 8 oz.
Pencil
Scissors
Foam Paintbrush
Plaid ® Hot Glue Gun Helpers
Hot Glue
Beads
Headpins
Jump-rings
2 Jewelry pliers
Gem glue
Pin backing
1. Create the Podgeable pin by placing the holiday shape on holiday themed papers, trace around the shape and cut out the design. (For this design we used one holiday shape and one small circle.) Apply a coat of Mod Podge to the back of the Podgeable shape and to the top of the paper, sandwich the two together, press with your fingers and allow to dry. Once dry, trim any excess paper from the edges. Repeat with the circle shape.
2.Once they are dry, glue together with the circle in the center. The loop on the Podgeable shape will be the bottom of the pin.
3. Attach beaded dangles to the loop on the Podgeable shape. First attach a jumpring to the loop on the Podgeable. Thread a bead onto a headpin, trim the length of the headpin if needed. Form a loop at the end of the bead and attach to the jumpring. Repeat with more beads.
4. Using gem glue, attach the pin back to the back of the Podgeable shape so the dangle is facing down.
* DIY VIDEO ~ 15 Holiday Craft and Gift Wrapping Ideas ~ DIY VIDEO *
Watch this video for 15 Holiday Craft and Gift Wrapping idea using the Podgeable Papers and Snowflakes.
Jar Gifts get a Mod Podge makeover with our new holiday papers!
Jar Gifts are so popular! You can use recycled jars or new jars ~ either way with a little Mod Podge and scrapbook paper you can create a custom look on the outside. Fill the jars with anything from caramel corn or candy to cookie mix or bath salts.
This project we designed with our new Mod Podge Papers and Podgeable Snowflakes. Available at most Michaels. Check out our page at Plaid to view all our Mod Podge projects.
What you need:
Clean recycled jar
Mod Podge Holiday Papers or other holiday themed scrapbook papers
Mod Podge ® Hard Coat, 8 oz.
Pencil
Scissors
Hot Glue
Plaid ® Hot Glue Gun Helpers
Ribbons and trim
Twine
Silk flower
Snowflake rhinestone
Instructions
1. Cut a piece of Mod Podge Holiday themed paper to fit the lid of the jar. Apply a coat of Mod Podge to the back of the paper and position on top of the lid. Smooth any air bubbles with your finger. Wait 15 min. and top-coat with a layer of Mod Podge.
2. Hot glue ribbons and trims around the edge of the lid.
3. Cut a pieces and designs of Mod Podge Holiday themed paper to fit around the jar. Apply a coat of Mod Podge to the back of the paper and position on top of the lid. Smooth any air bubbles with your finger. Wait 15 min. and top-coat with a layer of Mod Podge.
4. Fill the jar with holiday snacks and seal with the lid. Tie twine ribbon around the jar. Hot glue a flower and gem to the tie.
PROJECT TIP: To get the jar and lid super clean, soak in vinegar and wash in the dishwasher.
* DIY VIDEO ~ 15 Holiday Craft and Gift Wrapping Ideas ~ DIY VIDEO *
Watch this video for 15 Holiday Craft and Gift Wrapping idea using the Podgeable Papers and Snowflakes.
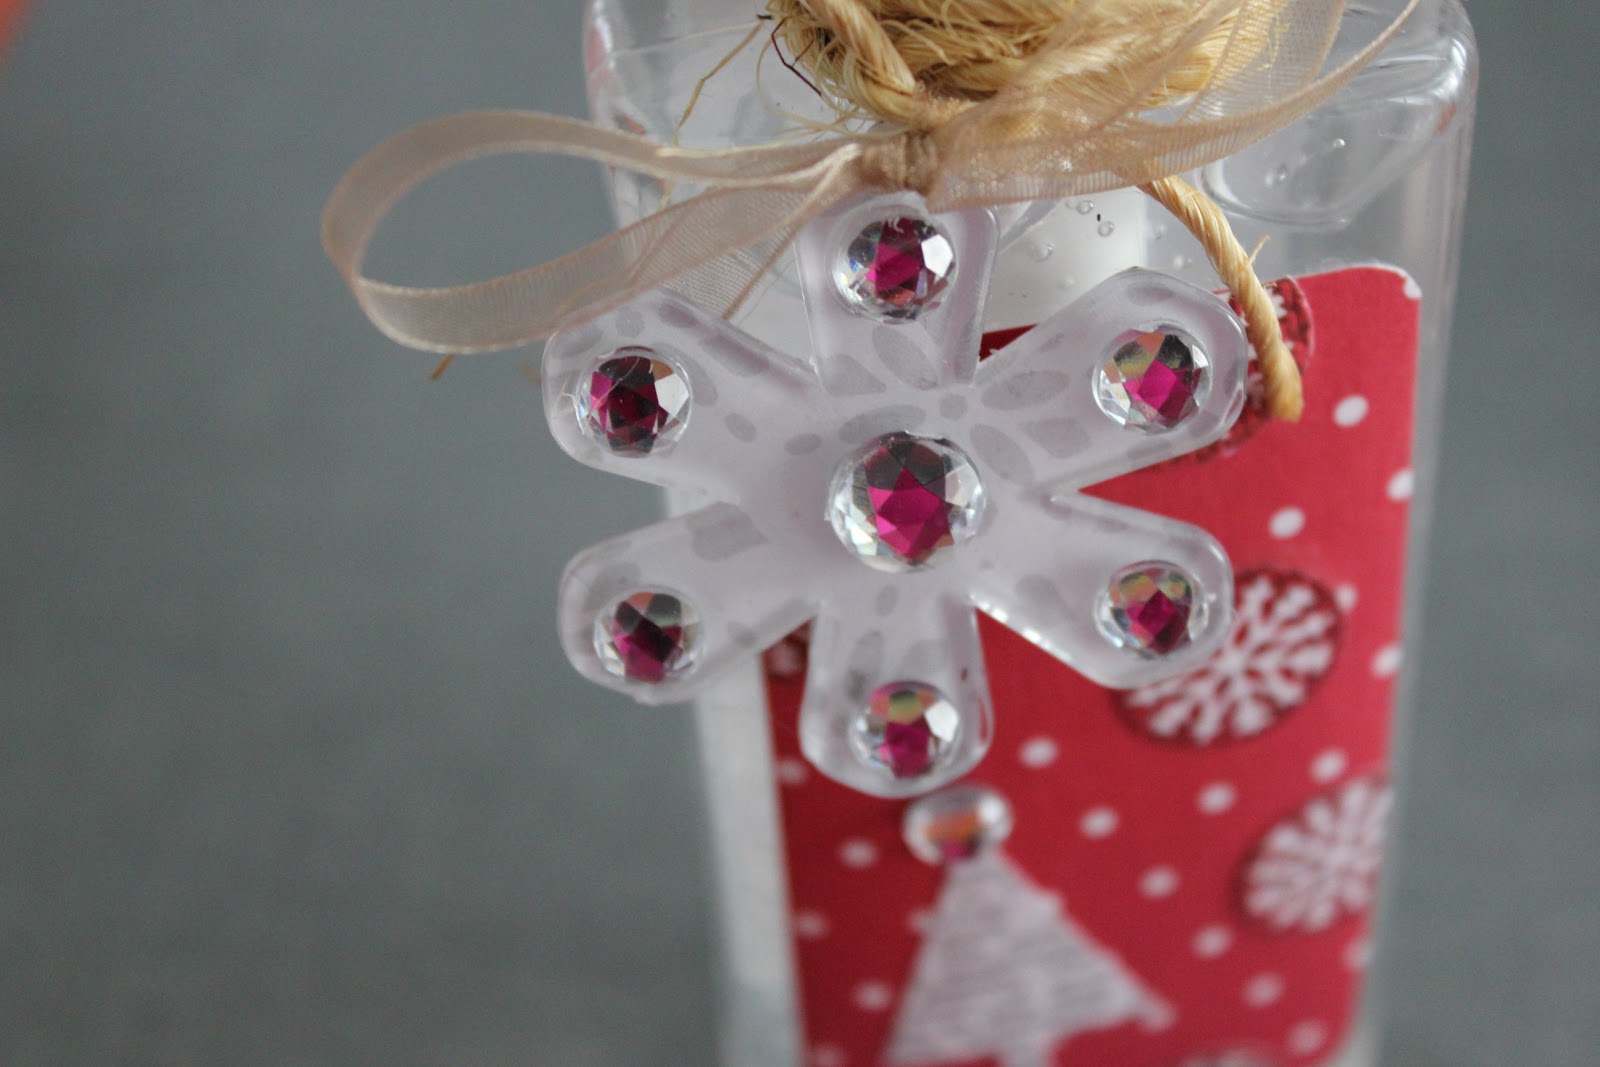
DIY Holiday Gifts for Teachers: Altered Hand Sanitizer
This project we designed with our new Mod Podge Papers and Podgeable Snowflakes. (Available at most Michaels Craft Stores.) Check out our page at Plaid to view all our Mod Podge projects.
What you need:
Mod Podge Holiday Papers or holiday themed scrapbook papers
Bottle of Hand Sanitizer
Mod Podge ® Hard Coat, 8 oz.
Pencil
Scissors
Foam paintbrush
Mod Podge Podgeable Snowflake or other snowflake shape embellishment
Plaid ® Hot Glue Gun HelpersHot Glue
Rhinestones
Ribbon
Twine
Instructions:
1. Trim holiday paper to fit the front of the hand sanitizer. Apply a coat of Mod Podge to the back of the paper and position on the bottle. Smooth any air bubbles with your fingers. Wait 15 min. and top-coat with a layer of Mod Podge. Layer small cut-outs
2. Trace the snowflake shape onto holiday themed papers. Cut out the shape. Apply a coat of Mod Podge to the back of the paper and position on the back of the snowflake Podgeable shape. Smooth any air bubbles with your fingers. Wait 15 min. and top-coat with a layer of Mod Podge.
3. Hot glue rhinestones to the bottle and to the snowflake. Thread a ribbon through the hole on the snowflake and tie onto the bottle. Add twine around the neck of the bottles.
PROJECT TIP: Use markers, paint or stickers to add a teach name or school year.
* DIY VIDEO ~ 15 Holiday Craft and Gift Wrapping Ideas ~ DIY VIDEO *
Watch this video for 15 Holiday Craft and Gift Wrapping idea using the Podgeable Papers and Snowflakes.
We have been making these for years and we never get tired of them. We even made them on season 1 of Creative Juice. The design ideas are endless because of the multitude of papers and fabrics that can be used to create one.
Please visit our project page at Plaid for all the instructions.