Friday, October 28, 2011

The ups and downs of HSN and the sweet feeling of Selling Out.


Over the past few years, I have been doing appearances at HSN.   It has been a wild ride, loaded with sleepless nights, long flights and heavy makeup. (I'm in LA and they are in Tampa)  Some days, I wanted to cry from being so tired, having crappy sales or from being partnered with a host that didn't let me explain the product. One day....I did CRY....but they were happy tears and they came on the heels of the words....SOLD OUT!

 Rain or Shine......24 hours a day!

The world of 24 hour home shopping TV is a world of its own.  It takes some time and experience to get the "hang" of it and I am so happy that I have found a place in this fun and nutty world.


I started presenting items for my beloved Mod Podge and Folkart Chalkboard Paint.  I graduated to licensed items for Hanna Montana and High School Musical.  For that gig, I sat my tush down and watched a marathon of the HM and all of the HSM movies.  I needed to know the "ins and outs" of Troy and Hanna for a good show. I needed to know why the Troy rubberstamps featured basketball jerserys.  Can you imagine if I got a call from someone and I didn't know???  That would be major egg on my face.... live 2:00 am egg.  I have also presented Silk Screen kits, glass paints and texture paints and each time the tales are nuts.

Hot Glue gun Helpers first shot at HSN!

Seven months ago, I finally got a chance to present our own invention, Hot Glue Gun Helpers.  I was thrilled, freaking out and most importantly, I was a proud mama....... and then I got the news that I would be on for 5 min at 4:00 am {East coast}......ouch.  Who would be watching???? Well surprise surprise - crafters were watching and we sold out!  Steve and I, are so grateful....It has been hard to invent a brand new product, navigate corporate America and keep your chin up at the same time.


When I walked out the HSN door the P.A. who assists with the mics and earbuds says to me "hey kid, you did good - call your rep tomorrow.  I think you will be happy" I almost started to cry.  I couldn't believe my ears.

I raced back to my hotel, turned on my laptop, navigated to my page at HSN and there it was in red.  SOLD OUT.  Take that XYZ retailers who told me crafters don't use hot glue.

My next stop with HSN and Hot Glue Gun Helpers would be a return trip that was crushed before it got off the ground.  You can read the nightmare story here.  In the end it was a blessing in disguise as our next presenting day had better time slots and I got to see some crafty friends.

 Me and my pal Sandi Genovese.  See her new products here.

The halls of HSN on 24 craft days are sprinkled with designers and industry veterans.  We all support each other, check out the new products and share lots of giggles.  Kind of like a quick summer camp that involves make-up and demos.


Soar art made with Hot Glue and Hot Glue Gun Helpers.

The demos are pretty easy since you only get a few moments to explain your product.  It is the displays that take awhile to create.  For the Hot Glue Gun Helpers, I made all the displays back home in Los Angeles and packed them in a suitcase for the trip.  For my displays, I like to show lots of different ways you can use hot glue and Hot Glue Gun Helpers. 

Love this scrapbook!

 This frame was so much fun to make.

 This was the demo card.  I'll be doing a step by step soon.

Of course I love making wreaths with hot glue.

 The day begins in the middle of the night with me rolling my hair in my hotel.  Most folks don't travel to HSN with rollers in their hair....but I have no shame and a whole lotta hair.  I just like to give the make-up folks a head start.


Next is table set up...here are Carol and Gena working behind the scenes to breakdown a previous product.  We are constantly opening boxes, setting up tables and then tearing them down again.

 About 1.5 hours before you go live you get into make-up....hopefully with a cup of coffee in your hand.  Next stop is getting a microphone and an ear bud.  If you look close we all have ear buds where producers are talking in our ears the whole time.....that gets old. LOL.


 Ready to go live.....just waiting in the wings!

Whew....it is an adrenaline pumping fast few minutes.
Generally it is over before you even knew it began. 


And here it was again.....the sweetest words an inventor has ever seen......SOLD OUT.  Thanks so much to everyone who called in, log on or just said good thoughts for us.  It has been such a journey and we could not have made it this far without the support of Plaid and all of you.  I got the good news last week that we will be back in March and they doubled their order......no pressure.

Thanks for joining me on this journey~
Cathie


Thursday, October 27, 2011

Free Patterns: Easy Halloween Dog Tee's and Costumes


Lark Crafts is giving away free dog costume patterns from my book, Bow Wow WOW!  Pop on over and download a PDF today!

Lots of low sew ideas!

Our New Reel!


Have a peek at our new reel!  

We also have a new joint facebook page....please join us there for daily scoop!

Tuesday, October 25, 2011

Make a DIY Halloween place setting with scrapbook papers and Mod Podge.

Anyone who has been to my house for a holiday meal, knows that I "heart" chargers - as nuts as it sounds....I really do just like the way they frame a plate.  So when I was working on Halloween ideas and came across black chargers at the dollar store...I was a bit smitten and inspired!

You only need a few things...... {{Gather This}}

Glass Plate
Pencil
Scrapbook Paper
Mod Podge
Foam Paintbrush
Torn Book Pages
Folkart Metallic Paint in Silver
Paper Towel


 Begin by tracing a circle from scrapbook paper.  This should be sized to fit the base of the plate.

 Apply a coat of Mod Podge to the printed side of the paper.

Apply a second coat of Mod Podge to the back of the paper.

Place the paper in the center (backside) of the plate.  Press any air bubbles with your fingers, smooth your brushstrokes.  Use a damp paper towel to clean any Mod Podge that is brushed over the edge of the paper.  Allow to dry.  Hand wash the top only with a damp rag.  Don't submerge in water.

Working on the charger, Mod Podge torn book pages around the center of the charger.  Allow to dry.

Scrunch a damp paper towel into a ball.  Dip the paper towel into silver paint.  Tap paint around the edges.  Allow to dry.

Finished Charger.

Layer the plate over the charger.

Make This: Frida Inspired Paper-mache Skull for Day of The Dead.

Paper-mache Skull for Day of The Dead.

I love Mod Podging with old book pages....they create such interesting textures and prints.  I usually pick up used paperbacks at my local thrift shop for under 50 cents.  My favorite are the old romance novels....they are so fun to read while you craft!  LOL.

This was designed for Plaid and was featured in our 2011 Halloween designs.  You can see our page at Plaid here.

{Gather This}For this project you will only need a few supplies.....

Paper-mache skull (this was from Michaels)
Old book pages (cut into small squares)
Mod Podge Gloss
Foam Paintbrush
Hot Glue Gun Helpers
Hot Glue
Lace
Paper Flowers
Feather Trim
Sturdy Paper Box
Folkart Acrylic Paint - 661 Metallic Sequin Black
Folkart Acrylic Paint – 2578 Leaf Green

  Coat the back and front of the book pages with Mod Podge, position onto the skull, smooth any air bubbles with your finger and top coat with a layer of Mod Podge. Continue adding more papers until the entire skull is covered.  Allow to Dry.  
 
  Cut a strip of lace to be the veil. Gather the lace with your fingers and attach using hot glue.  Be sure to wear Hot Glue Gun Helpers so you don't burn your finger. 
 
Hot glue feathers, flowers and other embellishments.  {{see the broken earring glued to the side?}} You can embellish the skull with almost anything that fits the theme.
 
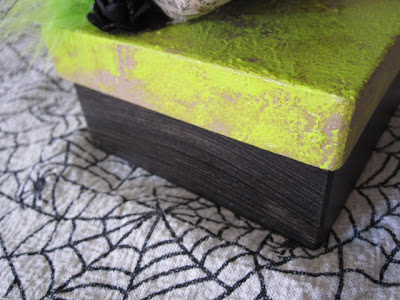
Texture the top of the box by thickly applying random pounces of Mod Podge.  Allow to dry.

Dip the foam paintbrush into leaf green paint, tap off the excess and tap onto the top of the box in a distressed fashion.  
 
 Paint the base of the box with a foam paintbrush and black paint.   
 
  Hot glue the skull to the top of the box. Add more flowers and feathers around the base of the skull.  

Wednesday, October 19, 2011

Halloween Witch Crafts: Kids Milk Jug Pinata


Kids will go batty for this milk jug pinata! Made with Mod Podge and tissue paper! This Mod Podge project was designed for Plaid. Pop by my page at Plaid to see this project and tons more ideas!!!


Materials Needed:
FolkArt One Stroke Brushes - Script Liner, #1
FolkArt Artists Pigments - Pure Black
FolkArt Artists Pigments - Titanium White
FolkArt Metallics - Gunmetal Gray
Mod Podge Gloss
Filbert brush
Plastic milk/water jug (1 gallon)
Craft knife
Candy
Masking tape
Scissors
Tissue paper - Lime Green
Foam paintbrush
Tacky Glue
Black felt square
One 2" Styrofoam ball
Two Googly eyes
Egg carton
Yarn
Skewer
Tape

Steps:

1. Make sure the milk container is clean and dry before starting. Cut a U-shaped flap in the back of the milk jug with a craft knife (parents help with the knife).

2. Fill the jug with candy and tape the flap closed with a small piece of masking tape. This is just to hold the flap down as you add tissue paper, so you only need to use a little bit of tape.

3. Cut your tissue paper into small (roughly 2") squares and paste them to the jug with Mod Podge. Put as many or as few layers of tissue paper for your desired look, but be sure to cover the opening with two to three layers this will hold the flap down just enough so that the pinata will be able to burst open when hit. Allow the Mod Podge to dry thoroughly.

4. For hair cut jagged bangs into the felt and glue to the pinata (use the photo for placement reference).

5. Using the craft knife, slice the Styrofoam ball in half. Press your finger into the dome portion of the ball for the Googly eyes. Glue the eyes into the wells on the balls. Glue the eyes to the pinata.

6. Just above the eyes paint a scar across the forehead and a squiggle on the chin with Pure Black paint and a detail brush. Paint a squared mouth with the Pure Black paint using the larger brush. Paint teeth using the Titanium White paint.

7. Cut 2 egg sections from the egg carton. Paint them with the Gunmetal Grey paint. Glue to the sides of the head with tacky glue.

8. Using the tip of the craft knife. Poke a small hole in the top back of the pinata. Poke a second hole in the back of the pinata about 1" down from the top. Tape a long piece of yarn to a skewer and thread through the two holes. Tie a knot in the yarn to secure and hang.
Thursday, October 13, 2011

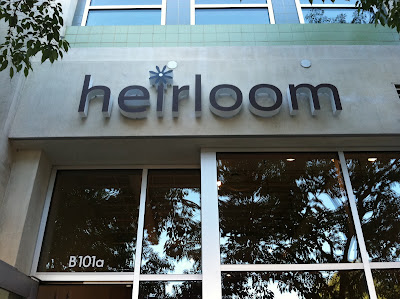
Heirloom in Claremont, CA - Grand Opening this Weekend.


If you are a fan of Creative Juice, then you are a fan of my good pal......Rob Lewbel and you don't even know it.  Rob (aka Robbie) and I go way back.......he was pals with my hubby before I met my hubby.

Over the years Rob and I have collaborated on many projects together - short films, photography art and Creative Juice.  Rob was a huge creative force behind Creative Juice.  He directed almost half of the 104 episodes and even directed the episode that I got my first Emmy Nomination for.

Rob dives head first into creative projects so when he told me that he along with his gf Becky were going to open a shop I just knew it would be awesome......and it is.  The shop has a arty, foodie, vintage, diy and local vibe.  They feature handmade, artists and cool stuff.

The grand opening is this Sat - so if you are in the area pop by!  


I spy Mod Podge


Art by me and Rob.

Back home with my candle purchase.....really good scent and soy.

LinkWithin

Related Posts Plugin for WordPress, Blogger...