Monday, June 28, 2010

I am a tease......again

This past weekend the machine was working overtime and the spools were spinning their magic. Oh how I love sewing - especially when it is for my next book.

Yep - I am working on a Mod Podged dress form! I made her for Winter CHA.

Max is truly board with my sewing and is wondering when he gets his mommy back.

Friday, June 25, 2010

Crafting & Cooking For 4th of July!

My Etsy Shop - Americana Picnic

Check out etsy if you are looking for embellishments and supplies for your 4th of July crafting.


Mango Salmon, Grilled Corn & Spiked Lemonade
Smores on a Stick & Cherry Cheesecake Pie


Star Painted and Stitched Napkins
&
Cookie Cutter Napkin Rings


These are so easy to make. The cookie cutters were Mod Podged with fabric scrap strips to give them a little extra pop. I picked the napkins up from Target and jazzed them up with a little Folkart fabric paint and embroidery floss. Click for complete instructions.

Recycled Denim Table Runner
visit this blog post for step-by step pictures

This is the perfect project for recycling an old pair of jean and for using up scrap fabrics. Click for complete instructions.

Quilted Star - Made with fabric and Mod Podge!

I picked up the star from a shop call Big Lots, a discount store that always has seasonal merchandise. The star was painted with a "not so hot" stars and stripes design - so I painted over it and Mod Podged some quilting fabrics to the points. Click for complete instructions.


My First 4th Baby Bib and T-shirt Set!

New babies will want to join in the celebration! Jazz up some $dollar store items with a little fabric paint. Click for complete instructions.

Firecracker Bean Bag Toss

Build your own backyard carnival game with old coffee cans and a piece of plywood. Kids will love playing this classic game of toss.

Wednesday, June 23, 2010

Make This! Playing Card Purse

Heading to Vegas or Atlantic City this summer? You really should whip up this show stopping laminated card purse!

On the set of Creative Juice - Vegas Baby Episode 603


Supplies:
1 Deck of Old Playing Cards (26 needed)
Hole punch
3/16” eyelets (154 needed)
Eyelet setter & hammer
¼” decorative red ribbon (7 yards)
Yarn or plastic canvas needle
Scissors
Laminating Sheets
2 sheets of 8.5 X 11 inch decorative paper
2 sheets of 4.25 X 8.5 inch decorative paper
1 sheet of 4.25 X 11 inch decorative paper
Glue stick
Two 10” lengths of ¼” diameter clear plastic tubing
1/8” dowel or bamboo skewer


1. Purse front and back: Glue stick 8 cards to one sheet of 8.5 X 11 inch sheet of paper. Repeat for the second sheet of paper. Laminate the sheets, trim the excess lamination from the edges.


2. Purse bottom: Glue stick 4 cards across the 4.25 X 11 inch sheet of paper. Laminate the sheet, trim the excess lamination from the edges.


3. Purse sides: Glue stick 3 cards 4.25 X 8.5 inch pieces of paper. Laminate the sheets, trim the excess lamination from the edges.

4. Use an eyelet hole punch and an eyelet setter to attach the eyelets. Use a marking pen to mark each eyelet placement before setting them. On the sides of each panel that measure 11”, set the first eyelet ½” from the edge and set 11 eyelets total spaced an inch apart. On the sides of the panels that measure 4.25”, set the first eyelet at 5/8” from the edge and set 4 eyelets total spaced an inch apart. For the sides of the panels that measure 8 ½”, set the first eyelet ¾” from the edge and set 8 eyelets total spaced an inch apart.

5. Thread the ¼” ribbon through the yarn or plastic canvas needle. Beginning with the purse front and sides, lace them together with the 1/4” ribbon. At the first hole, leave a 5” tail of ribbon at the back of the hole to use for tying later. Lace through one side panel eyelet, through a front panel eyelet and repeat for security. Whipstitch the remaining holes together. Do decorative lacing at the top edges, where no panels are being laced together. Keep lacing and add the remaining side and back. After the sides, front and back panels have been laced together, tie off the end of the ribbon after lacing it twice through the last hole.

6. Next lace the bottom to the purse, using the same technique.

7. To make a handle: thread a length of the ¼” ribbon through each length of tubing by folding an end over a dowel or skewer and pushing it through the tubing. Tie each end of the ribbon through an eyelet at the top of the purse to secure the handle.

Wanna know about my Creative Juices?

Head on over to Lark Crafts to learn more about my Creative Juices!

Thursday, June 17, 2010

Make it: Easy Ribbon Headbands

Rhinestone Ribbon Headband

Making headbands on Creative Juice!

Supplies:
Plastic headband
Ribbon (the same width or slightly smaller than the width of the headband)
Fabri-Tac glue
Tiny rhinestones
Jewel glue
Toothpick

Using Fabri-Tac glue, add a dot of glue to one end of the headband on the backside. Add glue along the front of the headband. Attach the ribbon down the center of the headband, wrapping a small portion to the back edge.

Use clothespins to secure the ribbon while you are working.

Using jewel glue, attach small rhinestones down the center of the ribbon, guiding the rhinestones with a toothpick and allowing them to dry.

Wednesday, June 16, 2010

Sewing at the hair salon

120 projects completed for my next book. Only about 40 more to go.

Thursday, June 10, 2010

Stitching poolside

Working on a design for my next book. Sitting under a huge palm tree.

Wednesday, June 09, 2010

Dye stripes with Elmers Glue and Rit Dye

Carousel Tote Bag for RIT Dye
Follow this link for complete instructions!

This simple technique of creating dyed stripes is so fun and addicting! The best part is that you will only need Elmers washable school glue, blue painters tape and rit dye to create the stripes. Embellish with Folkart fabric paints, freezer paper stencils, rhinestones, ribbons or anything that strikes your fancy.

Monday, June 07, 2010

Week 9 - 101 Snappy Fashions Giveaway

In Barnes and Noble and Now Shipping!

To celebrate the release of 101 Snappy Fashions, I am giving away a goodie pack each week for the next few weeks. The goodies are themed by chapter and will include a signed copy of the book, a grand prize and a few fun extras! Keep coming back each week and enter to win another set of goodies. Follow my blog, my facebook or my twitter to stay in touch! :)

Add your designs to Flickr!

I have been getting lots of emails with pictures of snapsuits and toddler tees created from the book. I love seeing all the pictures so much and I want to be able to share them with everyone, so I set up a Flickr group where you can post all your creations.


_______________________________


Week 9 - Chapter 9 - Bring On The Bling
Have a peek at a few scans from the book featuring some of my favorite designs from Chapter 9.

# 82 Anchors Away

# 82 Little Flirt & Paris

#84 Baby Blossoms

#90 Rock Star
_______________________________


Week 9 Loot!
Tons of goodies!!! Rit fabric dye, iron-ons, scissors and other supplies to get you started altering baby snapsuits.

A signed copy of 101 Snappy Fashions

A baby snapuit and 2 pairs of Simplicity Scissors!!

3 bottles of Rit Dye & a Snapsuit

Baby Snapsuit, Foam Stamp, Rhinestone Peace Iron-on

4 fun and festive Iron-ons

_____________________________

The business stuff....

All items are provided by me (Cathie Filian) and are in accordance with the Blogher Rules.

To enter: Simply leave a comment to THIS specific post by telling me if you have ever altered a baby snapsuit or if you have babies on the way! :)

Your comment MUST link to your particular blog or web site or include your e-mail address. Otherwise, I won't be able to get in touch with you if you win! Any entries that do not include
some way of getting in touch will be disqualified.

Deadline: Comments must be received by midnight EST June 14th, 2010. Odds of winning will depend on the number of eligible entries received.

Other rules:
1. You must have a mailing address in the United States of America (sorry international folks!).
2. Only one entry comment per person.

How it works: Each comment will be assigned a sequential number. The winning number will be selected from a random number generator, so there will be no favorites, simply a game of chance.

Make it: Ribbon Sachets

On the set of Creative Juice ~ making ribbon crafts!

Scrap Ribbon Sachets

A simple sewing technique turns ribbons into sweet smelling lavender sachets perfect for drawers and linen closets.

Supplies:
12” of 2 ½ ” wide ribbon
12” of 2 ” wide ribbon
Lavender or potpourri of choice
Matching thread
Sewing machine
Hand sewing needle
Small artificial flowers (optional)


1. Layer and center the narrower ribbon onto the wide ribbon, so that both sides are facing up. Stitch in place.

2. Fold the ribbon in half crosswise (right sides to right sides) and sew around the ribbon leaving a small opening for turning.

3. Turn the ribbon sachet right side out and fill with lavender or potpourri.

4. Fold in the raw ends and stitch the opening closed. Sew on small flower embellishments, if desired.

Make it: Ribbon Bookmarks

Scrap ribbons and extra buttons are all you need to make cute, elegant bookmarks.

Supplies:
16” piece of decorative ribbon
“Stop Fray” glue
Fancy button (not too heavy)
Hand sewing needle and thread
Scissors


1. Cut a diagonal edge into both ends of the ribbon. Add some “Stop Fray” to prevent the ribbon from fraying.

2. Stitch a decorative button to one end of the ribbon and you are ready to mark your place in your book.

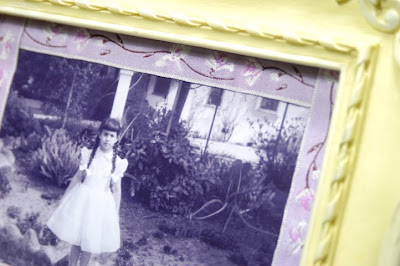
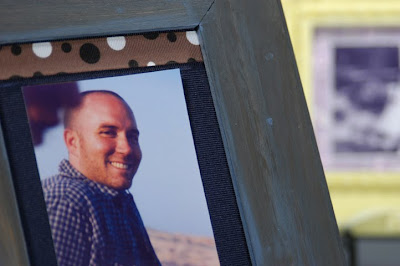
Make it: Ribbon Photo Mat

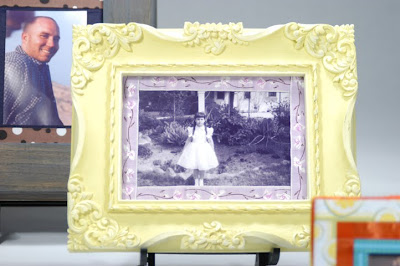
Turn boring picture frames into custom canvases using simple strips of ribbon and tape.

Supplies:
Store bought photo frame
Photo (smaller than the frame)
Decorative ribbons (various sizes and colors)
Double sided tape


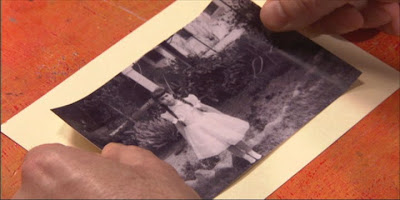
1. Attach a picture smaller than the photo frame to the center of the backing board of the frame using a bit of doubled sided tape in the corners.

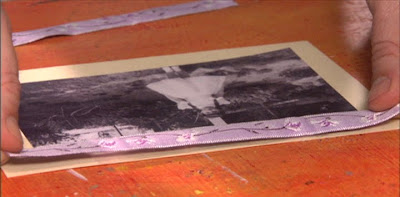
2. Cut two pieces of ribbon the same width as the frame and two the same length. Attach the ribbons around the photo using double-sided tape, filling in the space between the photo and the frame and creating a ribbon mat. You can layer up the ribbons, if desired.

3. Re-insert the photo and backing board back into the frame.

Make it masculine!

LinkWithin

Related Posts Plugin for WordPress, Blogger...