 Feeling frisky? Keep your cats happy and entertained with these simple, affordable toys for those wild and crazy kitties.
Supplies:
Old shipping box
Craft knife
Wrapping paper
Tape
Soup can
Pencil
Ball or stuffed mouse
Steps:
1. Tape closed all ends of box and use soup can to trace 2 –3 columns of circles on one side of the box.
2. Cut circle out with craft knife. Also cut 2 windows on either short side of box.
3. Cover box using wrapping paper and tape. To neatly reveal the holes and windows, cut the paper away from the windows & circles, but leave a 1” rim. Then notch the rim to wrap over the hole edges and secure with tape.
4. Toss it your cat’s favorite ball or stuffed mouse and watch them hunt.
Supplies:
1/4” dowel rod
craft paint
Yarn
4x6” piece of cardboard
2 yards cotton string
Yarn needle
4x5” scrap of felt
Scissors
Hot glue and glue gun
Steps:
1. Start by making the tassel. Wrap the yarn around the piece of cardboard, lengthwise, 20-25 times. Cut one entire end side of the wrap to remove from card. Tie the yarn into a knot in the center.
2. Working with the cotton string, tie a knot 2/3 down its length. Use a yarn needle to thread the short side of the cotton string through the tassel knot, from top down. Pull the string through until the knot hits the tassel. Wrap the short string end with the needle around the tassel fringe just below the knot. Wrap at least 5-10 times, then pull needle back and forth through the wrap to secure it. Snip the short end of the string.
3. Paint the dowel any desired color with craft paint. Allow the paint to dry and wrap one end with a scrap of felt, securing with hot glue. Wrap the long end of the string around the other end of the dowel rod, securing it with hot glue.
Cats love the sound of plastic bags and crinkled paper. This play/nap mat has a few layers of plastic bags to keep your kitty happy.
Supplies:
18 x 24” flannel fabric
18 x 24” terry fabric
18 x 24” quilt batting
3-5 soft plastic shopping bags
pins
thread
sewing machine
Steps:
1. Lay flannel fabric face down. Layer grocery bags evenly over surface, then quilt batting on top of both and pin all layers together being sure to tuck in any stray bag edges.
2. Sew 1/4” seam around all edges. After edges are sewn, quilt any design you choose by stitching through all layers. The quilting will keep the bags from moving out of place as your cat naps or plays on it.
3. Pin quilted piece and terry fabric right sides together. Sew 1/3” seam around all edges, leaving 4” hole along one edge. Notch corners, turn right side out, and stitch the hole closed.
Made for pennies on the dollar!
Supplies:
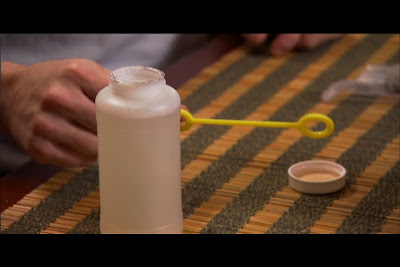
Plastic container and bubble wand
Water
Organic detergent
Catnip essential oil
Steps:
1. Mix the water, detergent, and essential oil in the plastic bottle. Blow bubbles!
Use dried beans or rice to create this simple toy that will keep your cat entertained for hours.
Supplies:
Old film canister
7x7” cotton fabric
Two 8” pieces embroidery floss
1 teaspoon dry rice or beans
Scissors
Fabri-tac glue
Steps:
1. Fill an old film canister with 1 teaspoon of dried rice or beans and replace the lid.
2. Press two 2 1/2” hems into opposite edges of the cotton fabric. Then press one of the other free sides under 1”.
3. Roll the fabric around the film canister, beginning along the open edge. Secure the edge with Fabric-Tac glue and tie the side ends with embroidery floss.


Wow, the crafty kitty motherload! I love these! I'll be linking.
ReplyDeleteVery cute! I am hoping to adopt a kitten from the local shelter in the Spring, so I am sure I will find myself making lots of goodies for it! Thanks for sharing these ideas :)
ReplyDeleteMiss Cathie, do you happen to have an email I can send questions to? I've messaged you before [girl from boomer sooner ville :)] and i was just wondering if you had an email i could send some questions to... thanks so much
ReplyDeleteThese are great ideas- I'm definitely going to be making a few of these for my cats!
ReplyDeleteWow, I have seen the crinkle sacks in the store for a hefty price. I don't see why I couldn't make a sack too.
ReplyDeleteI tried and I managed to do it. Yeeiiii !!!! ... I am very happy
ReplyDeleteThese are great! We love our kitties here - one from the humane society, the other was rescued after being abandoned and we bottle fed her.
ReplyDeleteI linked on my weekly roundup - thanks so much for sharing!
Great ideas! My girl scout troop will make some of these as our community service project!
ReplyDeleteJust made the crinkle mat for a Christmas present for my kitties. Used the plastic that wrapped up some gift boxes. Wonderful crinkle factor! Thanks for the tutorial.
ReplyDelete