
This Contest is closed!
The Winner is
Ilovetoteach (at) yahoo.com!!
Visit this link to enter the Week 7 contest! :)
The Winner is
Ilovetoteach (at) yahoo.com!!
Visit this link to enter the Week 7 contest! :)
 available for pre-order - available April 2010
I am just a few weeks away from 101 Snappy Fashions release and to celebrate I am giving away a goodie pack each week until the release of the book. The goodies will be themed by chapter and will include a signed advanced copy of the book, a grand prize and a few fun extras! Keep coming back each week and enter to win another set of goodies. Follow my blog, my facebook or my twitter to stay in touch! :)
This giveaway is worth $130!!!
I have 5 weeks of Giveaways after this week!
Check back every Tuesday for the next giveaway
Check back every Tuesday for the next giveaway
_______________________________
 #51 Team Burp
 # 57 Early Rap

#60 Crowned
_______________________________
_______________________________
Week 6 Loot!
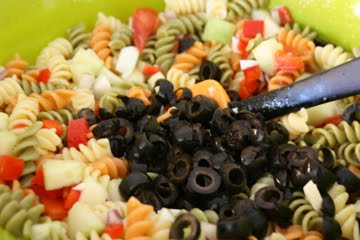
 Tons of goodies!!! Paints, Rit fabric dye, iron-ons, scissors and other supplies to get you started altering baby snapsuits.
 A signed advanced copy of 101 Snappy Fashions
 12 different baby themed iron-ons.
 3 bottles of Rit Dye & a baby snapsuit
 2 pairs of scissors from Simplicity and a baby snapsuit
 Baby Snapsuit, Mod Podge, Foam Stamp
 6 fun and festive Iron-ons
 Tons of goodies!!! Paints, Rit fabric dye, iron-ons, scissors and other supplies to get you started altering baby snapsuits.A signed advanced copy of 101 Snappy Fashions
 12 different baby themed iron-ons.
 3 bottles of Rit Dye & a baby snapsuit
 2 pairs of scissors from Simplicity and a baby snapsuit
 Baby Snapsuit, Mod Podge, Foam Stamp
 6 fun and festive Iron-ons
_____________________________
The business stuff....
All items are provided by me (Cathie Filian) and are in accordance with the Blogher Rules.
To enter: Simply leave a comment to THIS specific post by telling me if you have ever altered a baby snapsuit or if you have babies on the way! :)
Your comment MUST link to your particular blog or web site or include your e-mail address. Otherwise, I won't be able to get in touch with you if you win! Any entries that do not include
some way of getting in touch will be disqualified.
Deadline: Comments must be received by midnight EST April 6th, 2010.
Odds of winning will depend on the number of eligible entries received.
Other rules:
1. You must have a mailing address in the United States of America (sorry
international folks!).
2. Only one entry comment per person.
How it works: Each comment will be assigned a sequential number. The winning
number will be selected from a random number generator, so there will be no
favorites, simply a game of chance.


